Part 2: Deploying a contract
Before you deploy the contract to Etherlink Mainnet, you must test it on a sandbox or test network. Etherlink provides a local sandbox that lets you test contracts without needing to use external networks, but many tools such as block explorers are not available on the sandbox. For access to tools such as block explorers and indexers, and to make your contracts available to systems that are not on your computer, you can deploy to a public test network such as Etherlink Shadownet.
Optional: Deploying to the Etherlink sandbox
Deploying to a sandbox can be useful to verify that your deployment scripts work before deploying to a test network. Follow these steps to deploy a local Etherlink EVM node in sandbox mode, a special mode that behaves like an entire Etherlink network.
-
Start the Etherlink sandbox based on Etherlink Shadownet as described in Running a local sandbox. In short, starting the sandbox involves these steps:
-
Install the latest release of the
octez-evm-nodebinary as described in Running an Etherlink EVM node. -
Initialize the data directory for the EVM node, as this example:
octez-evm-node init config \
  --network shadownet \
  --data-dir ~/sandbox-shadownet \
--dont-track-rollup-node -
Start the sandbox by running this command, putting your account address in the
--fundargument:octez-evm-node run sandbox \
--network shadownet \
--data-dir ~/sandbox-shadownet \
--init-from-snapshot \
--fund 0x45Ff91b4bF16aC9907CF4A11436f9Ce61BE0650d -
Verify that the sandbox node is running. For example, you can call an RPC endpoint with a
curlcommand to verify the amount of XTZ in the bootstrap accounts, as in this example:
curl -X POST -H 'Content-Type: application/json' \
  --data '{"jsonrpc": "2.0","method": "eth_getBalance","params":["0x45Ff91b4bF16aC9907CF4A11436f9Ce61BE0650d"],"id": 1}' \
http://localhost:8545 -
-
In the
backendproject, create a file namedscripts/deploySandbox.tswith this code:import { network } from "hardhat";
async function main() {
const { viem, networkName } = await network.connect();
const client = await viem.getPublicClient();
const [walletClient] = await viem.getWalletClients();
console.log('Deploying contract with account', walletClient.account.address);
console.log(`Deploying contract to ${networkName}...`);
const deployedContract = await viem.deployContract("PredictxtzContract");
console.log("Contract deployed to:", deployedContract.address);
console.log("Creating a market");
const tx = await contract.write.createMarket([
"Will it rain tomorrow?",
604800,
]);
console.log("Waiting for the tx to confirm");
await client.waitForTransactionReceipt({ hash: tx, confirmations: 1 });
console.log("Confirmed");
}
main()
.then(() => process.exit(0))
.catch((error) => {
console.error("Deployment failed:", error);
process.exit(1);
});This script deploys the compiled contract and verifies that it can be called by creating a prediction market. The account that deploys it automatically becomes the administrator account.
-
Compile the contract:
npx hardhat compile -
Run this command to run the script and deploy the contract to the sandbox:
npx hardhat run scripts/deploySandbox.js --network etherlinkSandbox
If the deployment script runs correctly, it deploys the contract to the sandbox and prints information about it, as in this example:
Deploying contract with account: 0x45Ff91b4bF16aC9907CF4A11436f9Ce61BE0650d
Deploying contract to etherlinkSandbox...
Contract deployed to: 0x981a41a17ef89f3189a533c155566b1fb626bf1d
Creating a market
Waiting for the tx to confirm
Confirmed
If you see any errors, try these troubleshooting steps:
-
Verify that your contract matches the contract at https://github.com/trilitech/tutorial-applications/blob/main/etherlink-prediction/backend/contracts/Contract.sol.
-
Make sure that you compiled the contract before running the deployment script.
-
Make sure that you used your account in the
--fundargument when you started the sandbox. -
Check that the port the sandbox is running on (by default, 8545) matches the port in the
hardhat.config.tsfile.
Deploying to Etherlink Shadownet Testnet
In this section you deploy the contract to the Etherlink Shadownet Testnet, where you can test it and interact with it on a block explorer without working with real funds.
-
Using the Etherlink Shadownet faucet, get some XTZ in your account to pay for transaction fees.
-
Create a deployment script for Shadownet in a file named
scripts/deployShadownet.js:import { network } from "hardhat";
async function main() {
const { viem, networkName } = await network.connect();
const [walletClient] = await viem.getWalletClients();
console.log('Deploying contract with account:', walletClient.account.address);
console.log(`Deploying contract to ${networkName}...`);
const deployedContract = await viem.deployContract("PredictxtzContract");
console.log("Contract deployed to:", deployedContract.address);
}
main()
.then(() => process.exit(0))
.catch((error) => {
console.error("Deployment failed:", error);
process.exit(1);
});This file is the same as the file you used for the sandbox but it does not include the step of creating a prediction market.
-
Run this command to deploy the contract to Shadownet:
npx hardhat run scripts/deployShadownet.js --network etherlinkShadownetIf deployment is successful, Hardhat prints the address of the deployed contract to the console, as in this example:
Deploying contract with account: 0x45Ff91b4bF16aC9907CF4A11436f9Ce61BE0650d
Deploying contract to etherlinkShadownet...
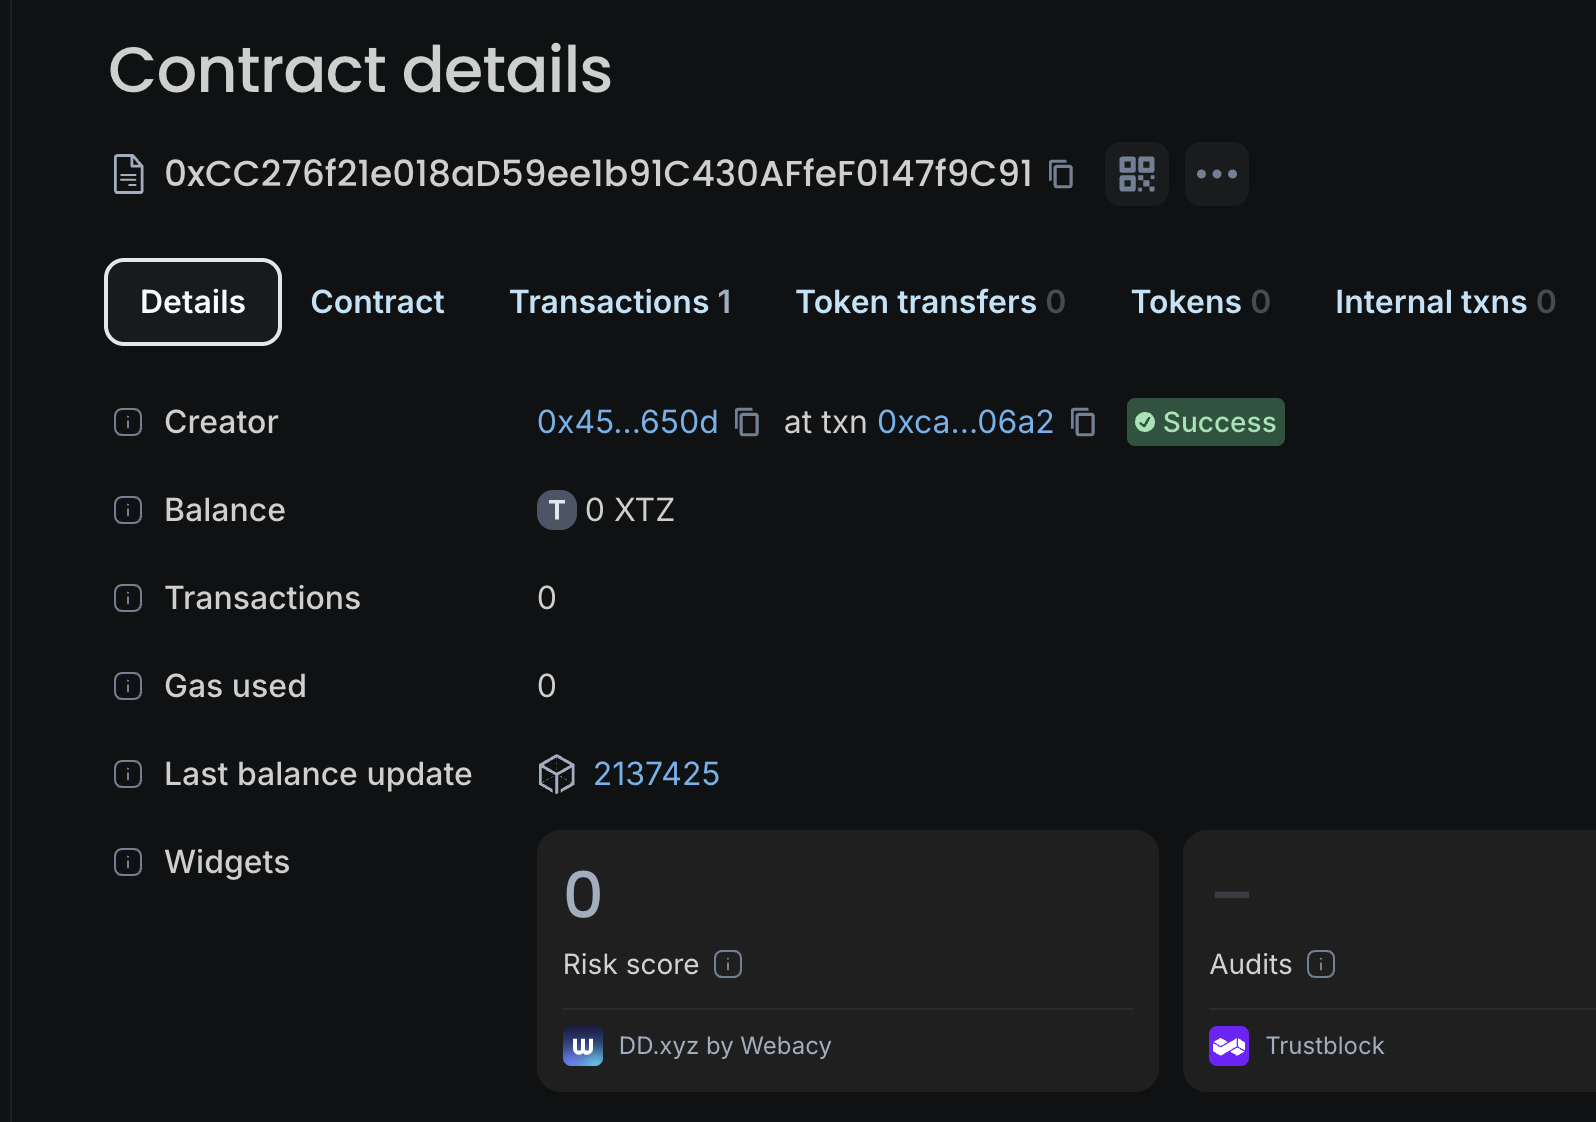
Contract deployed to: 0xCC276f21e018aD59ee1b91C430AFfeF0147f9C91If the command failed, check your contract and deployment files and run the compilation and deployment commands again.
-
Copy the address of the deployed contract and look it up on the Etherlink Shadownet block explorer.
In the block explorer you can see the creator of the contract and information about its transactions.
Interacting with the contract
To test the contract, you can interact with it directly on the block explorer. However, you must add the ABI of the contract so the block explorer can format transactions correctly. The ABI is the complete interface for the contract, including all of its public functions and events. It is generated during the compilation process.
-
Log in to the Etherlink block explorer with your wallet by clicking
Log in, clickingContinue with Web3 wallet, and connecting your wallet. -
Upload the contract ABI:
-
Copy the ABI of the compiled contract by opening the
artifacts/contracts/Contract.sol/PredictxtzContract.jsonfile and copying the value of theabifield, which is an array. -
On the block explorer, go to the contract, go to the Contract tab, click Custom ABI, and click Add custom ABI.
-
In the pop-up window, give the contract the name
PredictxtzContractand paste the ABI array, as in this picture: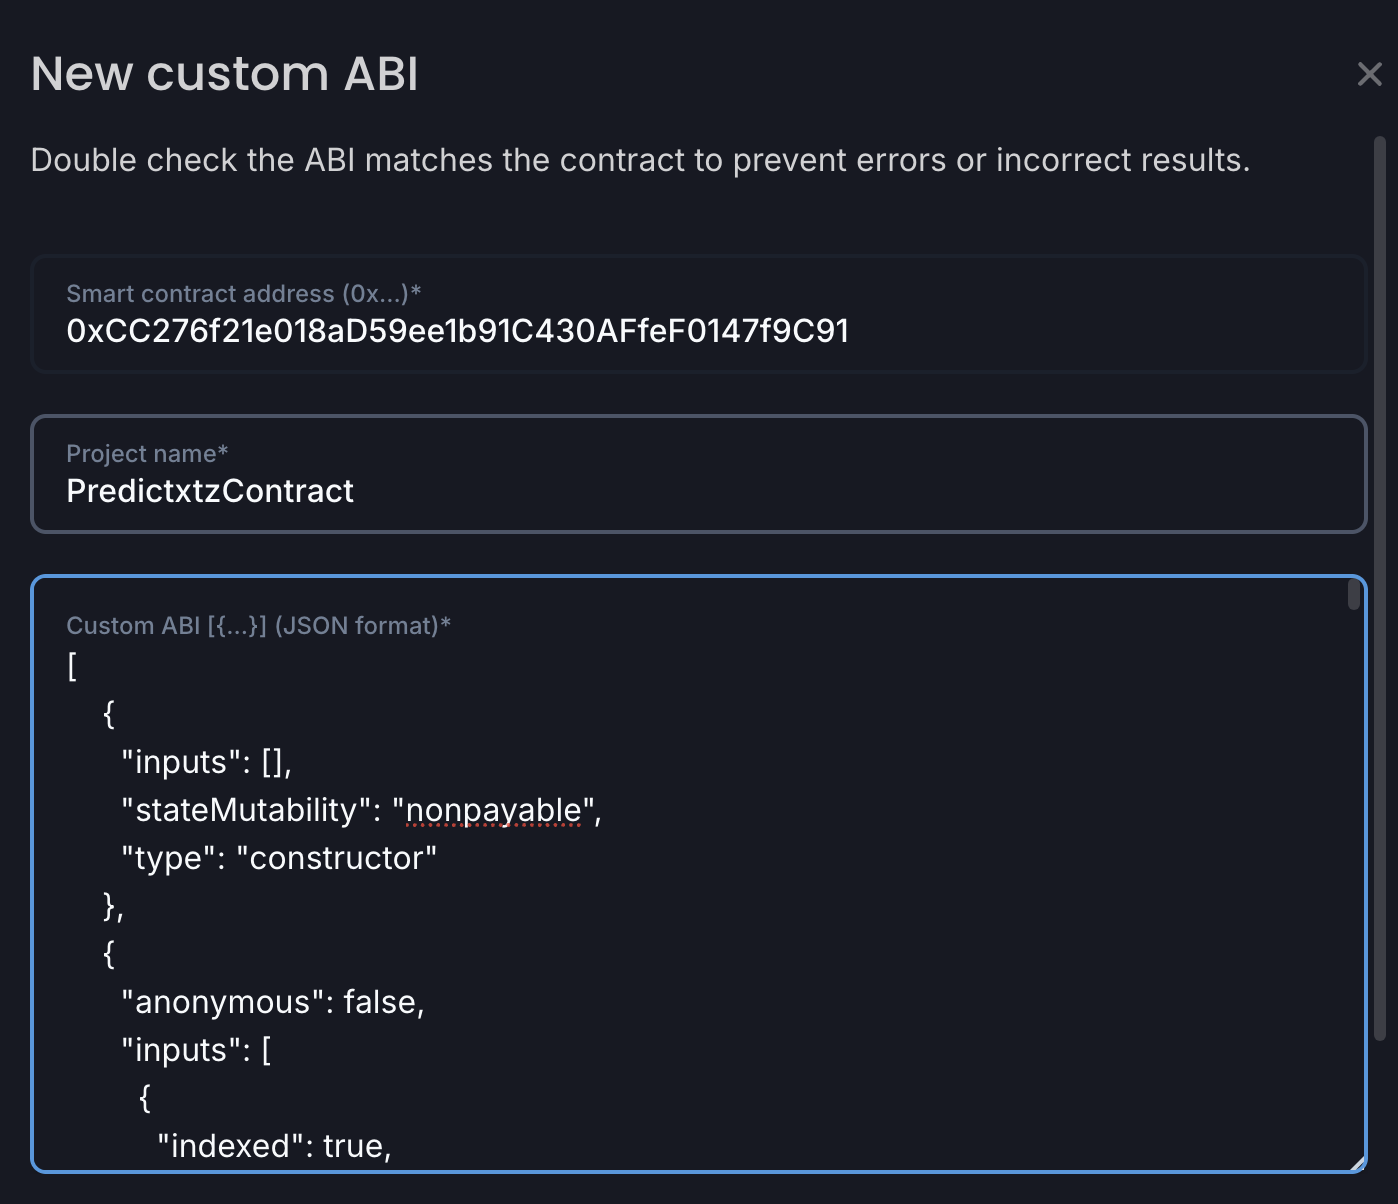
-
Click Create custom ABI.
Now the Contract > Custom ABI tab shows the functions in the contract:

-
-
Create the first prediction market in the contract:
-
Expand the
CreateMarketfunction. -
In the Question field, put the question for the prediction market, such as "Will it rain one week from today?"
-
In the Duration field, enter
604 800to represent one week in seconds.
-
Click Write.
-
Approve the transaction in your wallet and wait for it to be confirmed.
-
Now the contract has an active prediction market and users can make bets. Continue to Part 3: Setting up the frontend.
 Page Outline